How to Barbecue a Turkey on an Outdoor Kettle Grill
This barbecued turkey has delicious smoky flavor and the gravy made from the drippings tastes so good. Here you’ll find step-by-step instructions and images on how to cook a turkey on a kettle grill.

Have you ever tasted turkey cooked on a kettle BBQ charcoal grill?
First of all, the smell when it’s cooking is just heavenly.
And the flavor of the turkey tastes as good as it smells.
It’s also so juicy and tender.
About this Recipe
We’ve made our holiday turkeys on a kettle BBQ grill for years and the outcome is consistently delicious.
It’s actually pretty easy to make this turkey because the cook time is based on a calculation related to the weight of the turkey.
And the number of coals used is set at a certain amounts during the cooking process.
For the Turkey
For this recipe, the turkey needs to be either fresh or completely defrosted.
Before it’s placed on the grill, the turkey is lightly coated in butter and seasoned with granulated garlic, salt and pepper.

As the it cooks, the juices go into a dripping pan that’s placed below the grill.

These drippings make the best smoky flavored gravy (a link to this gravy recipe is at the end of this post).
And the leftovers make a wonderful smoky-flavored turkey sandwich.

Cooking Time
The suggested cooking time for a fresh or completely defrosted turkey WITHOUT stuffing is 11 minutes of cooking per pound.
And the suggested cooking time for a fresh or completely defrosted turkey WITH stuffing is 13 minutes of cooking per pound.
About the Cooking Time
Since there are variables related to the cooking process such as;
how hot the coals are, amount of stuffing packed in the cavity, and amount of moisture in the stuffing…
Don’t completely rely on this timing for the turkey to be thoroughly cooked.
It’s best to check the temperature of the turkey for doneness.
Here’s a link to directions on how to check for doneness
Butterball (Turkey) website “How to Check for Doneness”.
ITEMS NEEDED
Ingredients:
A whole fresh or completely defrosted turkey, butter, salt, pepper and granulated garlic.
Grill Equipment:
- 22.5″ Charcoal kettle standing barbecue*
- Charcoal Rails – accessory that fits onto the bottom grate that’s in the kettle barbecue. The rails keep the coals off to the sides for indirect cooking
- Hinged Cooking Grate – accessory used as the top rack where the turkey is placed when cooking
- Multi-Purpose Utility Lighter with a Long Durable Wand for Lighting Barbecue Grills – this is used to light the coals
*Some of the newer kettle barbecue grills may come with some of these accessories.

Cooking Equipment:
- Metal Pan (9″ x 12.5″) – placed on the “Charcoal Rack with Rails” in between the 2 sides where the charcoal is placed. It’s used to catch the drippings from the turkey
- Long Handled 2-Pronged Cooking Fork – used to lift and close each of the 2 sides of the “Hinged Cooking Grate” when adding the “Mesquite Charcoal Briquets” during the cooking process.
- Sturdy Extra Long Barbecue Hot Mitts – these may be used to assist with lifting the fully cooked turkey from the grill
Two Types of Charcoal Briquettes:
- 1 Bag (7.9 pounds) Mesquite Charcoal Briquettes – used multiple times for cooking
- 1 Bag (6.3 pounds) Match Light with Mesquite Charcoal Briquettes – USED ONLY ONE TIME when initially prepping the BBQ with charcoal)
HOW TO MAKE THIS RECIPE
Detailed instructions are located at the bottom of this post.

Determine the Timing of When to Start the Cooking Process:
- Figure out when you want to carve and serve your turkey
- Calculate how long it will take to cook based on how much it weighs
- Add the prep and resting time to determine when to start the process so the turkey will be ready to eat when you plan on serving dinner
Please see the example calculations (with and without stuffing) at the end of this post.

Prepare the Outdoor Grill:
- Place the charcoal rails in the BBQ
- Add the specified amount of charcoal to the BBQ – in this initial stage, only the Match Light Mesquite briquettes are added to the outdoor barbecue. THIS IS THE ONLY TIME THAT MATCH LIGHT BRIQUETTES ARE USED.
- After adding the Match Light Mesquite briquettes to the grill, seal the bag that they’re in.
- Move them far away from the grill so they’re not used again in the cooking process
- There will be some black colored Match Light coals and some light brown Match light coals (these are the mesquite briquettes)
Please see the instructions at the end of this post for the number of charcoal briquettes to use.

About the Charcoal Rails
The charcoal rails are a handy grill accessory for this application so that the briquettes can be stacked in place.

Stacking the Charcoal Briquettes:
- Stack the coals evenly from side-to-side
- Make sure the coals are behind the charcoal rails
- Be careful not to stack the briquettes so high that they fall over the rail into the drippings pan that will be placed in the grill (the gravy is made with the turkey drippings)

The hardest part of adding the coals…

…is keeping the right count.

TIP – As soon as all of the Match Light briquets have been added, close the bag and store them away so not to mistakenly use them in the actual cooking process.
The coals added later in the cooking process will just be the regular mesquite charcoal briquettes (only the non-Match Light briquettes are used from here on out).
Lighting the Charcoal Briquettes

Follow the instructions on the bag of Match Light with Mesquite Briquettes to light the briquettes.
Step away as far as possible.
And carefully light up a few of the coals according to the package instructions using a multi-purpose utility lighter with a long wand that’s used for lighting barbecue grills.

Light a few of the coals…

…on one side to get them going.

Follow the instructions on the package of Match Light with Mesquite Briquettes to light the other side of coals.
Step away as far as possible.
And according to the package instructions carefully light a few of the unlit coals.

No need to put the lid on yet.

You may see some flames for just a short while.

But they should decrease fairly quickly.

Let the coals get hot (about 45 minutes).
Prepare the Turkey

While the coals are heating up, the turkey can be prepared.
Please see the instructions at the end of this post for how to prepare the turkey.
Add the Dripping Pan

Once the coals are hot (when they turn gray), using sturdy oven mitts, carefully (be careful not to touch the hot coals, rack, barbecue kettle or other hot surfaces) place the metal drippings pan on the lower rack in between the “Charcoal Rails”.

TIP – When putting the pan in the BBQ, be very careful not to get close to the hot charcoal or bump the rack that the briquets are on so that the dust from the charcoal won’t fly into the pan (since the pan will have drippings in it that the gravy is made out of).
Put the Hinged Cooking Grate in the BBQ
Using hot mitts, carefully (be careful not to touch the hot coals, rack, barbecue kettle or other hot surfaces) put the “hinged cooking grate” in the BBQ.
When putting the hinged cooking grate in the BBQ, try to do it very gently so not to bump, move or disturb the briquettes so the very light dust on them doesn’t get into the dripping pan.
Place the Turkey on the Cooking Grate

Transfer the turkey from the platter onto the cooking grate.

Place it in the middle of the cooking grate…

…right over the pan…

…that will collect the drippings.

Put the Lid on the BBQ

Put the lid on the BBQ with the vent on top of the lid open.

Adding More Briquettes (The Regular Mesquite Charcoal Only)

For the First Addition of Regular Mesquite Briquettes:
ABOUT 15 MINUTES AFTER PUTTING THE TURKEY ON THE GRILL take the lid off of the grill (this timing assumes that the turkey was put on the grill 45 minutes after lighting the briquets which would equal a total of 1 hour after the coals were initially lit).
Using the cooking fork, open the hinged cooking grates, and using long tongs, carefully add 10 regular mesquite coals to each side (be careful not to touch the hot coals, rack, barbecue kettle or other hot surfaces).
Then put the lid back on (with the vent open).
DO NOT USE the Match Light coals

Then for every hour thereafter,

…continue to use a cooking fork to open and close each side of the hinged cooking grates and use long tongs to carefully add 10 regular mesquite coals…

…to each side of the charcoal rails (be careful not to touch the hot coals, rack, barbecue kettle or other hot surfaces).

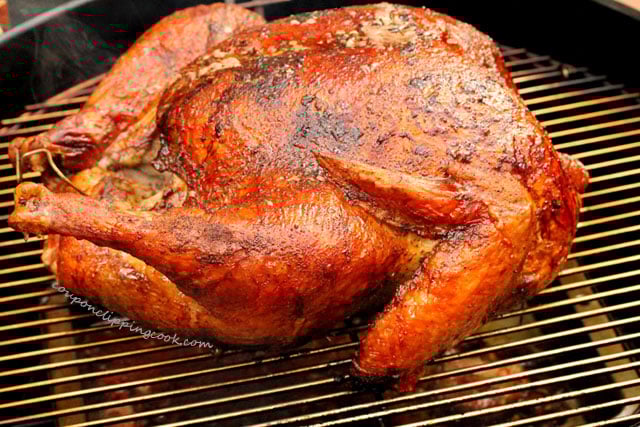
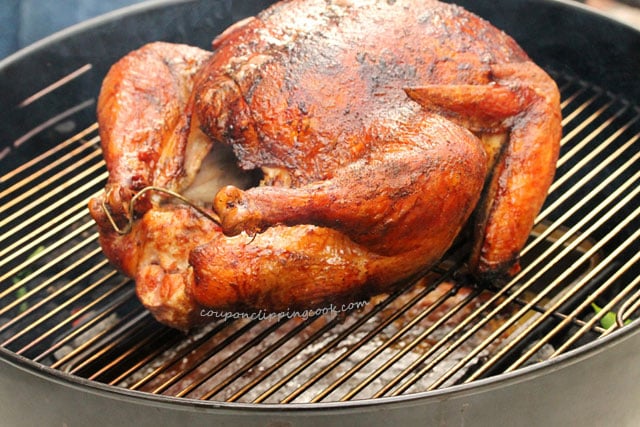
Here’s what the turkey looks like after about 1-1/2 hours of cooking.
Baste the Turkey
Every 1/2 hour or so, use a bulb-type baster to transfer the liquid from the cavity onto the top of the turkey.
This not only adds to the beautiful golden color of the turkey but will allow the delicious juice to drip into the gravy-drippings pan.
If the Top of the Turkey is Cooking Too Fast
If the top of the turkey is cooking faster than the rest of the bird, put a piece of foil (just large enough to cover the brown area) on top.
Add Citrus Leaves to the Grill for Flavor
This isn’t required but if you happen to have a citrus tree in your patio or yard…

…add some of the leaves to the coals…

…during the last hour of cooking for some added flavor.
Remove the Fully Cooked Turkey from the BBQ

When the turkey is thoroughly cooked, use sturdy oven mitts to carefully transfer it from the grill onto a large platter.
Be very careful because the turkey and the grill is hot.
Removing the turkey from the BBQ is a two-person task because one person needs to hold on to the platter while the other person transfers it from the BBQ to the platter (using sturdy hot mitts).
TIP – The turkey should be transferred to a large sturdy platter with edges (to catch the juice that runs off of the bird).
Don’t transfer the turkey from the BBQ directly onto a cutting board because the juice will run over the sides of the cutting board and make a mess.
Let the Meat Rest
Let the turkey rest for 30 minutes before carving.
Remove the Drippings Pan from the Grill
Using sturdy hot mitts, carefully (be careful not to touch the hot coals, rack, barbecue kettle or other hot surfaces) remove the drippings pan from the grill.
TIP – THE DRIPPINGS PAN WILL BE VERY HOT. MAKE SURE TO HAVE A HEAT PROOF SURFACE TO SET THIS PAN ON AFTER REMOVING IT FROM THE GRILL.
While the meat is resting, use these drippings to make your gravy.
Serve
Serve the carved turkey with delicious gravy made from the drippings, and then it’s time to eat!
Here’s a helpful link on how to carve a turkey from the Kitchn “How to Carve a Turkey: the Simplest, Easiest Method”.
HOW TO CALCULATE WHEN TO START THE COOKING PROCESS***
A) Determine When You Want to Serve Your Cooked Turkey:
1. Decide when you want to serve your carved turkey and hold that thought
B) Determine How Long to Cook Your Fresh or Completely Defrosted Turkey (based on weight):
1. Do the math to determine how long it will take to cook your turkey by using this calculation:
The suggested cooking time is 11 minutes per pound (without stuffing); (13 minutes per pound with stuffing)***
C) Consider “Non-Cooking Time” (BBQ prep and resting time for the turkey):
1. Add 45 minutes for putting the starter coals in the BBQ and for them to get hot.
2. Add 30 minutes for the turkey to rest after it’s thoroughly cooked.
D) Total Time (add “B” plus “C”):
1. Add the amount of time to cook the turkey (“B” calculation based on the weight of your turkey), to the grill prep and heat time plus resting time (“C” which equals a fixed total time of 75 minutes).
E) Determine When to Start the Cooking Process (“A” minus “D”):
1. Now go back to when you want to serve the turkey (“A”) and subtract the amount of total time determined in (“D”). The result should give you the cooking process start time.
Here’s an Example for a 19 Pound Completely Defrosted Turkey:***
1. I want to serve my turkey at 5pm.
2. My unstuffed 19-pound turkey (fresh or completely defrosted turkey) should take 3.5 hours to cook***; 19 multiplied by 11 minutes = 209 minutes; 209 minutes divided by 60 minutes per hour = 3.48 hours. Which rounds to 3.5 hours.***
3. Add 45 minutes for putting the coals in the BBQ and for them to get hot.
4. Add 30 minutes for the turkey to rest after it’s cooked.
5. The total time for the turkey should be 4 hours and 45 minutes (3.5 hours, plus 45 minutes, plus 30 minutes).***
6. Subtract 4 hours and 45 minutes (total time for the turkey) from 5 pm (when I want to serve my turkey).
Answer – I’ll need to start the cooking process for my 19-pound unstuffed turkey (fresh or completely defrosted) at 12:15 pm. So, it’s ready to serve for dinner at 5 pm.***
*** These are suggested cooking times.
About the Cooking Time
Since there are variables related to the cooking process such as;
how hot the coals are, amount of stuffing packed in the cavity, and amount of moisture in the stuffing…
Don’t completely rely on this timing for the turkey to be thoroughly cooked.
It’s best to check the temperature of the turkey for doneness.
Here’s a link to directions on how to check for doneness
Butterball (Turkey) website “How to Check for Doneness”

The printable recipe is below.
Thank you so much for stopping by CCC!
SUBSCRIBE TO CCC
Don’t Miss a CCC Recipe! Subscribe now to Coupon Clipping Cook and get an email each time we have a new post. CLICK HERE TO SUBSCRIBE TO COUPON CLIPPING COOK.

How to Barbecue a Turkey on an Outdoor Kettle Grill
Ingredients
For the Fresh or Completely Defrosted Turkey (ingredients are based on a 19 pound turkey):
- 1 whole turkey (fresh or completely defrosted turkey)
- 4 tablespoons melted butter (salted)
- 1 tablespoon granulated garlic
- 1 tablespoon ground black pepper
- 2 teaspoons salt
For the Equipment:
- Weber 22.5” Charcoal Kettle Standing BBQ
- 1 bag (7.9 pounds) Mesquite charcoal briquets used multiple times during the cooking process.
- 1 bag (6.3 pounds) Match Light with Mesquite charcoal briquets these Match Light briquets are used only one time…when initially prepping the barbecue with the charcoal
- A metal or aluminum disposable pan (9″ x 12.5″) for the drippings that will be used to make the gravy
- Charcoal Rails an accessory that fits onto the bottom grate that's in the kettle barbecue; the rails keep the coals off to the sides for indirect cooking
- Hinged cooking grate an accessory used as the top rack where the turkey is placed when cooking; it has hinged sides so that just the sides can be lifted in order to add more coals; the hinged sides on this rack need to be placed right over the sides of the "Charcoal Rack with Rails" where the charcoal is placed. Some of the newer Kettle Barbecue Grills may already come with this grate.
- Multi-Purpose Utility Lighter with a Long Durable Want for Lighting Barbecue Grills used to light the coals
- Long Handled 2-Pronged Cooking Fork used to lift and close each of the 2 sides of the "Hinged Cooking Grate" when adding the "Mesquite Charcoal Briquets" during the cooking process
- Sturdy Extra Long Barbecue Hot Mitts used to assist with lifting the fully cooked turkey from the grill. After the turkey is removed from the "Hinged Cooking Grate" these mitts are used to remove the very hot "Hinged Cooking Grate" from the barbecue in order to get access to the dripping pan. They're also used to lift out the very hot metal dripping pan so that the drippings can be used to make gravy
Instructions
DETERMINE WHEN TO START THE COOKING PROCESS:
- The recipe below is for a 19 pound fresh or completely defrosted turkey.Please see the explanation below that discusses how to calculate the suggested total process time to cook a turkey on an outdoor kettle grill.
PREPARING THE OUTDOOR GRILL:
- For the Charcoal Rails – Clip the "Charcoal Rails" onto the lower grate inside of the barbecue.
- Adding Charcoal to the BBQ – Put plastic gloves on (for handling the unheated briquets). In this initial stage, only the Match Light briquets are added to the outdoor barbecue.
- THIS IS THE ONE AND ONLY TIME THAT THE MATCH LIGHT BRIQUETS ARE USED. The non-Match Light briquets will be added later during the cooking process.
- To each side of the BBQ, inside the charcoal rails, add 25 Match Light with Mesquite briquets. There will be some black colored coals and some light brown coals which are the Match Light mesquite briquets.
- Since the Match Light briquets are infused with lighter fluid you’ll only use them for the initial stage of getting the coals hot. The coals added later in the cooking process will just be the regular (non-Match Light) charcoal briquets.
- The bag of Match Light briquets can now be closed and stored away so not to mistakenly use them again in this cooking process.
- LIGHTING THE MATCH LIGHT BRIQUETS – Next, according to the instructions on the bag of Match Light with Mesquite Briquets, step away as much as possible and carefully light up a few of the coals on each side with a multi-purpose utility lighter with a long wand that is used for lighting barbecue grills.
- Let the coals get hot (about 45 minutes). No need to put the barbecue lid on yet. There may be flames for just a short while.
PREPARING THE FRESH OR COMPLETELY DEFROSTED TURKEY (do this while the coals are heating up):
- Set the turkey on a large platter or large sturdy baking pan. Drizzle the melted butter over the turkey (in the cavity too).
- Then sprinkle the entire turkey (including the cavity) with granulated garlic, salt, and pepper. Set aside (just until the coals are ready).
PLACING THE DRIPPINGS PAN IN THE BARBECUE:
- Once the coals are hot (when they turn gray), using sturdy oven mitts, carefully (be careful not to touch the hot coals, rack, barbecue kettle or other hot surfaces) place the metal dripping pan on the lower rack in between the "Charcoal Rails".
- When putting the pan in the BBQ, be very careful not to get close to the hot charcoal or bump the rack that the briquets are on so that the dust from the charcoal won't fly into the pan (since the pan will have drippings in it that the gravy is made out of).
COOKING THE FRESH OR COMPLETELY DEFROSTED TURKEY:
- Using hot mitts, carefully (be careful not to touch the hot coals, rack, barbecue kettle or other hot surfaces) put the "hinged cooking grate" in the BBQ.
- When putting the hinged cooking grate in the BBQ, try to do it gently so not to bump, move or disturb the briquets so the very light dust on them doesn't get into the dripping pan.
- Transfer the turkey from the platter onto the cooking grate and center the turkey right over the pan that will collect the drippings.
- Put the lid on the BBQ with the vent on top of the lid open.
- ADDING THE REGULAR MESQUITE CHARCOAL DURING THE COOKING PROCESS – Every hour, (starting from when the initial coals were added), using a long handled 2-pronged cooking fork…open each side of the hinged cooking grate (charcoal rails).And carefully (be careful not to touch the hot coals, rack, barbecue kettle or other hot surfaces) use long tongs to add 10 regular mesquite coals to each side of the charcoal rails. (DO NOT USE the Match Light coals).
- FOR THE FIRST ADDITION OF MESQUITE BRIQUETS – ABOUT 15 MINUTES AFTER PUTTING THE TURKEY ON THE GRILL (this timing assumes that the turkey was put on the grill 45 minutes after lighting the briquets which would equal a total of 1 hour after the coals were initially lit), take off the lid.And using the cooking fork, open the hinged cooking grates, and use long cooking tongs to carefully add 10 regular mesquite coals to each side (be careful not to touch the hot coals, rack, barbecue kettle or other hot surfaces).
- Then put the lid back on (with the vent open).
- Continue to use a cooking fork to open and close each side of the hinged cooking grates and use long tongs to carefully add 10 regular mesquite coals (DO NOT USE the Match Light coals).
- If the turkey is getting too brown on the top during the cooking process, put a piece of foil (just large enough to cover the brown area) on the top of the turkey.
- Basting the Turkey – Every ½ hour or so, use a bulb-type baster to transfer the liquid from the cavity of the turkey, to the top of the turkey.This not only adds to the beautiful golden color of the turkey but will allow the delicious juice to drip into the gravy-drippings pan that's sitting on a rack under the turkey.
- This is not required but if you happen to have a citrus tree in your patio or yard, carefully drop a few green leaves between the spaces on the grill on to the coals during the last hour for added flavor.
REMOVING THE FULLY COOKED TURKEY FROM THE BARBECUE:
- WHEN THE TURKEY IS THOROUGHLY COOKED, using sturdy oven hot mitts carefully remove it from the grill on to a large platter and let it rest for 30 minutes before carving.
- Removing the turkey from the BBQ is a two-person task because one person needs to hold on to the platter while the other person transfers the turkey from the BBQ to the platter (using sturdy hot mitts).
- The turkey should be transferred to a large sturdy platter with edges because there will be juice that comes off of the turkey.
- So, it's NOT a good idea to transfer the turkey from the BBQ directly onto a cutting board because the juice from the turkey will run over the sides of the cutting board and make a mess.
- Using sturdy hot mitts, carefully (be careful not to touch the hot coals, rack, barbecue kettle or other hot surfaces) remove the drippings pan from the grill.
- THE DRIPPINGS PAN WILL BE VERY HOT SO MAKE SURE THAT THERE IS A HEAT PROOF SURFACE TO SET THIS PAN ON AFTER REMOVING IT FROM THE BARBECUE GRILL.
- While the turkey is resting, use these drippings to make gravy.
DECIDING WHEN TO START THE COOKING PROCESS***:
A) Determine When You Want To Serve Your Cooked Turkey:
- Decide when you want to serve the turkey and hold that thought.
B) Determine How Long To Cook Your Fresh or Completely Defrosted Turkey (based on weight):
- Do the math to determine how long it will take to cook the fresh or completely defrosted turkey by using this calculation: Suggested cooking time is 11 minutes per pound (without stuffing)***; (13 minutes per pound with stuffing)***
C) Consider “Non-Cooking Time” (BBQ prep and resting time for the turkey):
- Add 45 minutes for putting the starter coals in the BBQ and for them to get hot.
- Add 30 minutes for the turkey to rest after it’s cooked.
D) Total Time (add “B” plus “C”):
- Add the amount of time to cook the turkey (“B”- calculated based on weight of turkey), to the grill prep and heat time, plus resting time (“C” – fixed total of 75 minutes).
E) Determine When To Start The Cooking Process (“A” minus “D”):
- Now go back to when you want to serve the turkey (“A”), and subtract the amount of total time determined in (“D”).
Here’s an Example for a 19 Pound Fresh or Completely Defrosted Turkey:
- I want to serve my turkey dinner at 5 pm.
- My unstuffed 19 pound turkey (fresh or completely defrosted turkey) should take 3.5 hours to cook; 19 multiplied by 11 minutes = 209 minutes; 209 minutes divided by 60 minutes per hour = 3.48 hours. Which rounds to 3.5 hours.***
- Add 45 minutes for putting the coals in the BBQ and for them to get hot.
- Add 30 minutes for the turkey to rest after it’s thoroughly cooked.
- The total time for the turkey should be 4 hours and 45 minutes (3.5 hours, plus 45 minutes, plus 30 minutes).***
- I’ll need to start my 19 pound unstuffed fresh or completely defrosted turkey at 12:15 pm to have it ready for dinner at 5 pm.
- ***PLEASE NOTE: The cooking times of 11 minutes per pound for a fresh or completely defrosted turkey without stuffing, and 13 minutes per pound for a fresh or completely defrosted turkey with stuffing are suggested times.But since there are variables associated with cooking a turkey such as, but not limited to; how hot the coals are, how much stuffing is packed in the cavity of the turkey and the amount of moisture in the stuffing, it's very important not to completely rely on this timing for the turkey to be completely cooked through.MOST IMPORTANTLY, THERE'S ONLY ONE WAY TO MAKE SURE YOUR TURKEY IS COMPLETELY COOKED WHICH IS BY CHECKING THE TEMPERATURE OF THE TURKEY.Here's a helpful link that discusses how to make sure your turkey is completely cooked from the Butterball (Turkey) website "HOW TO CHECK FOR DONENESS".
Video
Notes
TIPS:
Barbecue Preparation
- Right after the Match Light briquets have been added it’s a good idea to close the bag and store them away so not to mistakenly use them in the actual cooking process.
- When putting the pan in the BBQ, be very careful not to get close to the hot charcoal or bump the rack that the briquets are on so that the dust from the charcoal won’t fly into the pan (since the pan will have drippings in it that the gravy is made out of).
- When putting the hinged cooking grate in the BBQ, try to do it gently so not to bump, move or disturb the briquets so the very light dust on them doesn’t get into the dripping pan.
Preparing the Fresh or Completely Defrosted Turkey
- When I first started cooking turkeys I thought that I was supposed to take that off and throw it away! Don’t be like me and do that! The hock lock needs to stay on the bird to secure the hind legs (or hock) of the turkey so that the turkey will cook evenly.
- If your turkey doesn’t come with a hock lock it may need to be “trussed” (or tied). Trussing, or tying a turkey with twine into a compact shape allows the turkey to cook evenly. Here’s a helpful link that you may like from Epicurious.com “How to Truss a Turkey: The Simple, No-Fuss Way” .
- Since I generally have toothpicks on hand I use them to secure the wings to the bird. As an alternative, the wing tips can be tucked behind the shoulders to lock them in place. Here’s a link to a slide from the article “How to Stuff and Prepare Your Thanksgiving Turkey” on MarthaStewart.com that shows how to tuck the wings under a turkey.
Cooking the Fresh or Completely Defrosted Turkey
- If the top of the turkey is cooking faster than the rest of the bird, put a piece of foil (just large enough to cover the brown area) on top of the turkey.
- Removing the turkey from the BBQ is a two-person task because one person needs to hold on to the platter while the other person transfers the turkey from the BBQ to the platter (using sturdy hot mitts).
Removing the Metal Dripping Pan from the Hot Barbecue
- AFTER THE TURKEY IS REMOVED FROM THE GRILL, USE STURDY HOT MITTS TO CAREFULLY REMOVE THE VERY HOT COOKING GRILL FROM THE BARBECUE IN ORDER TO ACCESS THE DRIPPING PAN.
- USE THE HOT MITTS TO REMOVE THE DRIPPING PAN FROM THE GRILL IN ORDER TO USE THE DRIPPINGS TO MAKE GRAVY.
- THE DRIPPING PAN WILL BE VERY HOT SO MAKE SURE THAT THERE IS A HEAT PROOF SURFACE TO SET THIS PAN ON AFTER REMOVING IT FROM THE BARBECUE GRILL.
Resting the Turkey
- The turkey should be transferred from the barbecue to a large sturdy platter with edges because there will be juice that comes off of the turkey. So, it’s not a good idea to transfer the turkey from the BBQ directly on to a cutting board because the juice from the turkey will run over the sides of the cutting board and make a mess.
Recipe for Gravy Made from Turkey Drippings
Here’s a link to the recipe for this delicious gravy “How to Make Turkey Gravy from Pan Drippings“.
Holiday Recipes
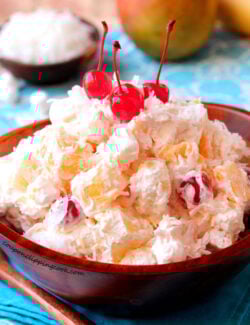
Holiday side dishes you may like; “Cherry, Pineapple and Mandarin Orange Ambrosia“, “Sage Sausage Stuffing (Dressing)” and “Roasted Garlic and Rosemary Mashed Potatoes“.
More Holiday recipes:
Cheesy Scalloped Potatoes with Sage and Ham
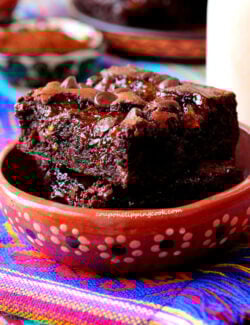
No-Bake Cherry Cheese Pie with Helpful Tips


Idk what we did wrong but after 8 hours on the bbq the Turkey was not done. It was a 13 pound Turkey. Followed every instruction and was raw. Help me figure this out please. And now what can I do.
Hi Patricia, was your turkey completely defrosted?
10 per side briqeuts charcoal or 10 total added each hour?
Hi Pete, it’s 10 per side added each hour.
About 15 minutes after putting the turkey on the grill, take off the lid, open the hinged cooking grates, and add 10 regular mesquite coals to each side. Then put the lid back on. Then for every hour thereafter, continue to add 10 regular mesquite coals (not the Match Light coals) to each side of the charcoal rails.
This is a great tutorial. I followed your mathematical equation and my 19 lb stuffed bird was cooked almost to the minute.
Cheers
Hi Scott, thank you for letting me know how it worked out for you.
Whoa. The color on that bird looks so good! I’ve never had a grilled turkey, but that might just have to change this year!
Hi Amy, I actually have the kettle BBQ just to make my turkey each year. Just the smell alone while it’s cooking is so amazing and of course the taste of the turkey is wonderful too. Have a great day!
Great post. Turkey looks great. I bet it taste great.
Hi Christine, it sure did taste great. Thank you for stopping by!
What a great tutorial…my kids were talking about this recently. Looks amazing!
Thank you!
Lovely! The turkey is looking beautifully barbecued and so even in its colour. Being cooked on the bone, the turkey would have tasted delicious. Great post and thanks for step by step preparation details.
Thank you very much!
Great post! I did a boneless turkey breast on the charcoal grill for my thanksgiving feast, it tasted amazing. The only thing I did different was that I soaked the breast in a salt brine the night before, that way I didn’t have to baste during the cooking process.
Hi Justin, what a great idea to soak the turkey in salt brine….I’m going to try that next time!