No-Bake Cherry Cheese Pie with Helpful Tips
This classic cherry cheese pie is simple to make but there’s a trick to making it turn out just right.

It only takes 6 ingredients to make this delicious cherry cheese pie and it’s so easy to make.
And most importantly, it tastes really good.
You may have seen this recipe before.
It’s been around for a long time, at least going back into the 1970’s.
About this Recipe
This no-bake cherry cheese pie is semi-homemade.
The filling is made from scratch, and the crust and cherry topping are premade.

This pie filling has only 4 ingredients; cream cheese, sweetened condensed milk, vanilla and reconstituted lemon juice.
This type of lemon juice is in a bottle and is generally located on the non-refrigerated juice aisle at the grocery store.

About the Reconstituted Lemon Juice in this Recipe
There are a couple versions of this recipe that I’ve seen the most of…where the only difference is how much reconstituted lemon juice is used.
In one version, 1/2 cup is used (the cheese pie filling is a little creamier and a bit more tart) and in another version, 1/3 cup is used (the cheese pie filling is a little thicker and just a bit less tart).
Between the 2 versions, the difference in the amount of reconstituted lemon juice used is 2 tablespoons plus 2 teaspoons (the difference between 1/2 cup and 1/3 cup).
The amount of reconstituted lemon juice used in this recipe is just about in the middle of the 2 versions mentioned above.

The Trick to Making this Pie Filling Firm, Smooth and Creamy
The trick to making this pie filling firm, smooth and creamy is to…
…only add the ingredients to the mixing bowl in a specific order.
(Don’t add the ingredients to the mixing bowl all at once)

The reconstituted lemon juice and vanilla must be hand-stirred into the beaten cream cheese mixture right at the end.

If the lemon juice and vanilla is mixed with the cream cheese mixture too soon, or it’s beaten rather than stirred in, the pie filling won’t get firm enough.
Chilling and Storing this Pie in the Refrigerator
For me, on a Holiday, my fridge space is at a premium.
To create more space in my fridge, I use the plastic lid that the graham cracker crust is packaged in, to cover the pie.
This way, when the pie is in my refrigerator, I can store light things on top of it.
How to Cover this Pie

For this cheese pie, once it’s made, no need to wrap it in plastic wrap when storing it in the refrigerator…
..what a mess that could make in a crowded fridge and there’s lots of potential for smashing the pie too.
A better way is to use the plastic lid that the premade pie crust is packaged in.
Just remove the label that’s on the plastic lid that the pie crust was packaged in.
Then wash and dry the lid and turn it over in the opposite direction from the original packaging.
This creates a “dome” that not only protects the pie, but also it allows light items in the refrigerator to sit on top of it.

To secure the lid, lift the foil edges on the pie tin (that the pre-made crust is in) so that the plastic lid can fit inside the edges.

When storing the pie, the foil edges are pinched down over the edges of the plastic lid to secure it in place.
This packaging trick really comes in handy.
Making the Pie Ahead of Time
This pie (just the filling in the crust) needs to chill for 3 hours before cutting it, and topping it with the cherries.
It’s the first thing I make on Thanksgiving morning because it’s so easy.
Plus, the extra time in the refrigerator allows the filling to “set” and become firm enough to cut into slices.
Cherry Topping Served on the Side
Since some people may not like cherries or want them on top of their slice of pie, an option is to serve the cherry topping on the side rather than on top of the entire pie.
This way, when serving the pie, each piece of pie is set on a serving plate as is…
…and then the slice of pie can be served with or without the cherry topping.
I personally like this cheese pie without the filling on top sometimes.

The chilled cherry topping can be served in a pretty serving dish (the bowl above is actually a candy dish).
And just add a spoon in the serving dish so each person can help themselves.

Spooning the cherry topping over each separate piece is such a pretty way to serve the pie…
…the cherry filling drips down the sides and the color contrast looks so appealing.
And you can also serve this cheese pie with a variety of different toppings so your guests can choose what flavor they would like.
Canned blueberry and apple pie filling toppings would be delicious.
Or fresh berries would be nice too.
Let’s check out the ingredients.

Cream cheese, sweetened condensed milk, reconstituted lemon juice (in a bottle), vanilla extract, graham cracker crust, and cherry pie filling
HOW TO MAKE THIS RECIPE
A printable recipe with the measurements and instructions is located at the bottom of this post.
(Some of the images and instructions below are the same as the tips mentioned above.)
Preparation
Cherry Pie Topping:
Transfer the cherry pie filling from the can into a small bowl that has a lid (or cover the bowl with plastic wrap).

Set aside in the refrigerator.
Chill the cherry pie filling in the refrigerator for at least 2 hours before serving.
Graham Cracker Pie Crust:
Remove the lid on the graham cracker crust.
And set the crust aside for easy access when it’s time to add the pie filling in it.
Remove the label on the plastic lid.
Then wash and dry the lid so it can be used to cover the pie after the filling is added (by turning it over in the opposite direction that the pie crust was packaged in).
Cream Cheese Pie Filling
Cream Cheese:

In a large bowl, add softened cream cheese…

…and beat with a mixer until light and fluffy.
Sweetened Condensed Milk:

To the bowl…

…add sweetened condensed milk and beat with a mixer until thoroughly blended.
Reconstituted Lemon Juice and Vanilla Extract:
To the bowl, add reconstituted lemon juice and…

…vanilla extract.

Stir with a spatula or large spoon until…

…it’s light and creamy.
Pour the Pie Filling into the Crust

Pour the cream cheese mixture…

…into the graham cracker crust.
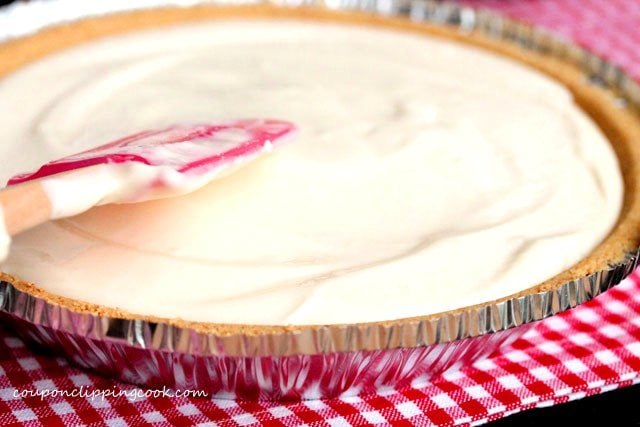
Using a spatula, gently spread the cream cheese mixture…

…evenly on top.
Cover the Pie
Open up the foil edges around the crust pan.

Turn the lid over (opposite from the way that it was originally on the crust pan) and set it over the cream cheese pie.
Close the foil edges over the plastic lid around the entire pie, and…

…set the pie in the refrigerator for at least 3 hours to chill.
Serve

Once chilled, and just before serving, cut each piece of pie that will be served, and set them on serving plates.
Then,

…top each piece of pie…

…with chilled cherry pie filling…

…and…

…enjoy.

Thank you so much for stopping by CCC!

SUBSCRIBE TO CCC
Don’t Miss a CCC Recipe! Subscribe now to Coupon Clipping Cook and get an email each time we have a new post. CLICK HERE TO SUBSCRIBE TO COUPON CLIPPING COOK.

No-Bake Cherry Cheese Pie
Ingredients
Graham Cracker Crust:
- 1 pre-made graham cracker crumb crust 9-inch size
Cream Cheese Pie Filling:
- 1 package (8 ounces) cream cheese, softened
- 1 can (14 ounces) sweetened condensed milk
- 1/4 cup plus 3 tablespoons reconstituted lemon juice (from a bottle)
- 1 teaspoon vanilla extract
Cherry Cheese Pie:
- Graham Cracker Crust
- Cream Cheese Pie Filling chilled
- 1 can (21 ounces) cherry pie filling chilled
Instructions
Preparation:
- Premade Graham Cracker Crust – Remove the lid on the graham cracker crust. Open up the foil edges around the pan that the graham cracker crust is in. And set the crust aside for easy access when it's time to add the pie filling in it.
- Remove the label on the plastic lid. Then wash and dry the lid so it can be used to cover the pie after the filling is added (by turning it over in the opposite direction that the pie crust was packaged in).
- Cherry Pie Filling – Transfer the cherry pie filling from the can into a small bowl that has a lid (or cover the bowl with plastic wrap). Set aside in the refrigerator. Chill in the refrigerator at least 2 hours before serving.An option is to serve the cherry topping on top of each cut piece of pie, rather than topping the whole pie with it.
Cream Cheese Pie Filling:
- In a large bowl, add only the cream cheese (softened) and beat with a mixer until light and fluffy.
- To the bowl, add only the sweetened condensed milk and beat with a mixer until thoroughly blended.
- To the bowl, add reconstituted lemon juice and vanilla extract. Stir with a spatula or large spoon until it's light and creamy.
Pour the Pie Filling into the Crust:
- Pour the cream cheese mixture into the graham cracker crust. Using a spatula, gently spread the cream cheese mixture evenly on top.
Cover the Pie:
- Turn the plastic lid (that the pre-made pie crust was packaged in) over, opposite of the way that it was originally on the crust pan, and set it over the cheese pie (the edges of the plastic lid should set within the opened edges of the foil crust pan).
- Close the foil edges over the plastic lid around the entire pie (so that the lid is secure and won't slide off of the pie pan).
- Chill in the refrigerator for at least 3 hours before serving.
Serve:
- Once chilled and just before serving, cut each piece of the pie that will be served, and set them on the serving plates.
- Top each piece of pie with chilled cherry pie filling.
Recipe adapted from “Easy Cherry Pie” by Borden Inc. “They’ll Love It!” recipe cookbook booklet, 1976.
Video
Notes
TIPS:
- Pie Filling – Add and mix the pie filling ingredients according to the directions (or the cheese pie filling may not set properly).
- Cover for the Pie – Use the plastic lid from the premade pie crust to cover the cheese pie after it’s made.
- Chill the Cheese Pie – The cheese pie needs to chill in the refrigerator for at least 3 hours before serving.
- Chill the Cherry Topping – Transfer the cherry pie topping from the can into a pretty serving dish with a lid (or cover with plastic wrap) and chill at least 2 hours. Then all you have to do when serving it on the side is remove the lid and add a spoon for your guests.
- Serving the Cherry Topping – An option is to serve the cherry pie topping on the side when serving the pie (rather than adding it to the top of the entire pie). This gives guests the option to top their piece of pie with the cherries or enjoy the pie without a topping.
- Alternative Toppings for the Cheese Pie – Other varieties of pie filling can be used for toppings instead of, or in addition to the cherry pie filling topping. Also, fresh berries would made a nice topping too.
This recipe was originally posted on November 23, 2013.
More Cherry Cheese Pie Recipes
More recipes made with cherry pie filling you may like; “Layered Cherry Cheese Pie in a Glass”, “Mini No-Bake Cherry Cheese Pies” and “Mason Jar Cherry Cheese Pies“.
Recipes Made with Cherries
Easy recipes with cherries:
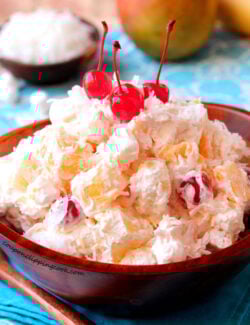
Cherry, Pineapple and Mandarin Orange Ambrosia
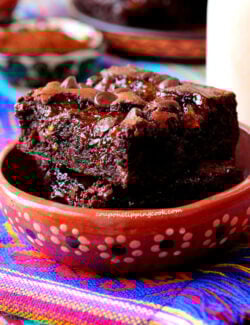
Cherry Cheesecake Swirl Brownies
Holiday Desserts
Popular Holiday desserts:
Irish Cream, Chocolate Cake and Raspberry Desserts
Pumpkin Pudding Puff Pastry Desserts


I originally received this recipe from my grandmother, beautifully written out on a recipe card. I didn’t start making it until after she had passed, as a kind of tribute, as she made this every year for Christmas and the whole family loved it.
You can imagine my frustration when I ended up with cream cheese “soup,” as hers always turned out perfectly. At first, I thought maybe she had copied the recipe down wrong, but then I looked online and saw carbon-copy versions on multiple websites. Still, the “soup” issue was and is a common complaint among reviewers, and the suggested ways to fix it are all across the board, none of which ever worked for me.
Which is why I am SO glad I stumbled across your website and saw your tip about adding the ingredients one at a time, and blending in the lemon juice and vanilla extract with a spatula instead of an electric mixer. I just made this pie last night for Valentine’s Day; when I checked on it this morning, it had set beautifully. Finally, a suggestion that actually works! THANK YOU! I know my grandma is smiling down from heaven now that I’ve finally made this pie the way it deserves to be made. 🙂
Hi Elizabeth, the comment you left was the most heartwarming comment I’ve ever had. I couldn’t help but think of my own grandma who also made this pie and it actually brought tears to my eyes. Thank you so very much for letting me know this pie turned out for you. And I’m so glad I could help!
nice!it seems very easy and looks delicious.
Hi Lety, thank you for stopping by!