Popcorn and Caramel Candy Cones
These popcorn and caramel candy cones are a fun and scrumptious finger food dessert filled to the brim with sweet and salty goodness.
Finger food desserts are so good especially when they’re filled to the brim with popcorn, caramel and chocolate like these candy cones are.
The top of these candy cones is in the shape of a great big scoop of ice cream.
The good news is that this “ice cream cone” won’t melt and it comes with a crunch that’s a little bit sweet and a little bit salty.
About this Recipe
The top and bottom of each cone is dipped in a vanilla candy coating, and the top is decorated with candy sprinkles and mini chocolate chips.
The bottom of each cone has vanilla candy coating on it to help give each dessert more “footing” to stand on its own when the filling is piled high.
Inside each cone is a layer of caramel, chocolate and lightly salted popcorn.
Then more of these layers are piled on top of the cone to look like ice cream.
It’s a fun treat and has a delicious combination of flavors and textures.
Let’s check out the ingredients.
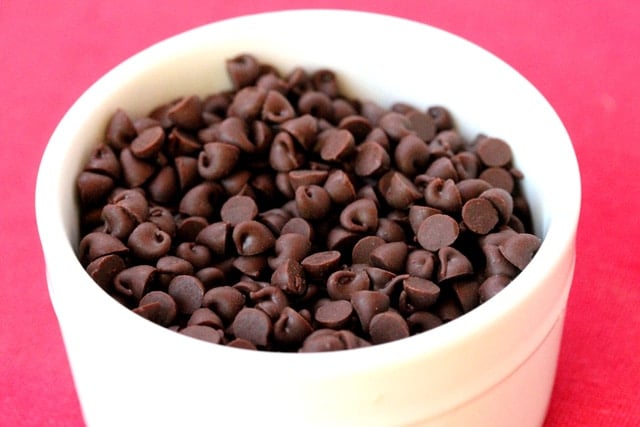
Caramel candies, vanilla coating (Almond Bark), popcorn, chocolate chips, Heath English toffee bits, candy sprinkles, and ice cream cones
HOW TO MAKE THIS RECIPE
A printable recipe with the measurements and instructions is located at the bottom of this post.
For the Candy-Coated Cones:
Lay a piece of parchment paper over a cookie sheet and set aside.
Candy Coating
Coating the Top of the Cone with Vanilla Candy – To a ramekin or small bowl with a diameter slightly larger than the top of an ice cream cone, add one of the vanilla candy-coating squares.
Melt the candy coating in a microwave for 30 second bursts making sure to stir between each 30 seconds.
Dip the top of the ice cream cone in the candy coating.
The bowl may need to be tilted slightly so the coating covers the area that is about an inch to two inches from the top of the cone.
Candy Sprinkles
Then right away (before the candy sets) sprinkle decorative candies and, or mini chocolate chips on top of the coating.
Coating the Bottom of the Cone with Candy – Next, set the bottom of the cone in the vanilla candy coating tilting the bowl slightly so the coating covers the area that is about an inch to two inches from the bottom of the cone.
Candy sprinkles can also be added to the vanilla candy coating on the bottom.
Set the bottom of the cone on the parchment paper and let the candy-coating set (about 30 minutes).
The candy coating on the bottom helps to give the cone a better “footing” so that it doesn’t tip over when the popcorn is stacked on the top.
Coating the Remaining Cones – After dipping two of the cones in the coating, add the other square of candy coating to the bowl and melt it in the microwave and…
…repeat the process of coating the top and bottom of the cones.
For the Popcorn and Caramel Chocolate Filling:
Popcorn
Popping the Popcorn – While the candy coating hardens,
pop the popcorn, add salt, and set aside.
Caramel
Melting the Caramel – To a medium size pan, add the caramels.
Heat the pan on low heat and stir constantly.
To the pan, add water and…
…continuously stir.
Once the caramels are melted, remove the pan from the heat and set aside for a quick moment.
Chocolate
Melting the Chocolate – In a small bowl, add the chocolate chips and…
…melt them in a microwave for 30 second bursts making sure to stir between each 30 seconds.
Filling the Candy Cones
Inside of each cone, drizzle caramel in the bottom (about 2 teaspoons of caramel in each cone).
Next,
…in each cone, sprinkle toffee bits (about 1 teaspoon per cone).
Then drizzle melted chocolate inside each cone (about 2 teaspoons in each cone).
Add popcorn to each cone until it reaches the top (of the cone).
Then drizzle more of the caramel,
and chocolate,
and top with more toffee bits.
Next add as much popcorn to the top of the chocolate that will stick.
Toppings
Topping Off the Cones – To form a mound on top of each cone, add more kernels of popcorn by dipping them in the caramel so they’ll stick.
When adding them, try to make an overall shape that looks like a scoop of ice cream.
Lastly, drizzle caramel and chocolate over the popcorn and…
…top with toffee bits.
The caramel hardens quickly so it may need to be warmed on the stove (on low heat stirring constantly) a couple times in between making the cones.
Serve
Let the caramel and chocolate harden on top of the popcorn before serving (about an hour).
Thank you so much for stopping by CCC!
SUBSCRIBE TO CCC
Don’t Miss a CCC Recipe! Subscribe now to Coupon Clipping Cook and get an email each time we have a new post. CLICK HERE TO SUBSCRIBE TO COUPON CLIPPING COOK.

Popcorn and Caramel Candy Cones
Ingredients
For the Candy Cones:
- 5 ice cream cones regular “cake” type cones with a flat bottom
- 4 ounces vanilla candy coating 2 squares of Almond Bark
- Decorative candy sprinkles
- 1/3 cup mini chocolate chips
For the Popcorn and Caramel Filling:
- 8 cups cooked popcorn, lightly salted (equals about 1/4 cup uncooked popcorn)
- 1/4 teaspoon salt
- 30 wrapped squares caramel candies unwrap each caramel candy
- 1 tablespoon water
- 1/2 cup chocolate chips
- 1/2 cup Heath English Toffee Bits
Instructions
For the Candy Coated Cones:
- Lay a piece of parchment paper over a cookie sheet. Set aside.
- Coating the Top of the Cone with Vanilla Candy - To a ramekin or small bowl with a diameter slightly larger than the top of an ice cream cone, add one of the vanilla candy coating squares.
- Melt the candy coating in a microwave for 30 second bursts making sure to stir between each 30 seconds.
- Dip the top of the ice cream cone in the candy coating. The bowl may need to be tilted slightly so the coating covers the area that is about an inch to two inches from the top of the cone.
- Then right away (before the candy sets) sprinkle decorative candies and, or mini chocolate chips on top of the coating.
- Coating the Bottom of the Cone with Candy - Next, set the bottom of the cone in the vanilla candy coating tilting the bowl slightly so the coating covers the area that is about an inch to two inches from the bottom of the cone.
- Candy sprinkles can also be added to the vanilla candy coating on the bottom.
- Set the bottom of the cone on the parchment paper and let the candy coating set (about 30 minutes).
- The candy coating on the bottom helps to give the cone a better "footing" so that it doesn't tip over when the popcorn is stacked on the top.
- Coating the Remaining Cones - After dipping two of the cones in the coating, add the other square of candy coating to the bowl and melt it in the microwave and repeat the process of coating the top and bottom of the cones.
For the Popcorn, Caramel and Chocolate Filling:
- Melting the Caramel - To a medium size pan, add the caramels. Heat the pan on low heat and stir constantly.
- To the pan, add water and continuously stir.
- Once the caramels are melted, remove the pan from the heat and set aside for a quick moment.
- Melting the Chocolate - In a small bowl, add the chocolate chips and melt them in a microwave for 30 second bursts making sure to stir between each 30 seconds.
- Filling the Cones - Inside of each cone, drizzle caramel in the bottom (about 2 teaspoons of caramel in each cone).
- In each cone, sprinkle toffee bits (about 1 teaspoon per cone). Then drizzle melted chocolate inside each cone (about 2 teaspoons in each cone).
- Add popcorn to each cone until it reaches the top (of the cone).
- Then drizzle more of the caramel and chocolate, and top with more toffee bits.
- Next add as much popcorn to the top of the chocolate that will stick.
- Topping Off the Cones - To form a mound on top of each cone, add more kernels of popcorn by dipping them in the caramel so they’ll stick. When adding them, try to make an overall shape that looks like a scoop of ice cream.
- Lastly, drizzle caramel and chocolate over the popcorn and top with toffee bits. The caramel hardens quickly so it may need to be warmed on the stove (on low heat stirring constantly) a couple times in between making the cones.
- Let the caramel and chocolate harden on top of the popcorn before serving (about an hour).
Desserts with Candy Coating and Colorful Candies
Here are more desserts with candy coating and colorful candies you may like…”Candy Cookie Cone Christmas Trees“, “Marshmallow Fun Pops” and “Girl Scout Cookie Pops“.
Dessert Recipes
More Dessert Recipes You May Like:


Holy Moly! These look crazy good!
Hi Kari, they are for sure! Have a nice weekend!
Dang woman, you should be arrested for this one. It’s just too cool.
Hi Kim, thank you for stopping by!